čtvrtek 2. listopadu 2017

Huawei p10plus notifications vibrations turn on/off

It took me quite a few days to figure out how to turn off vibration for messages notifications of my Huawei P10plus. I thought I would share it in case some of you struggle with that too.

What Huawei did is it assigned notification vibration settings for every single application, i.e. there is no overall notification vibration menu.

Here's how you do that:

  • Go to Settings  
  • Choose Notification & status bar
  • Enter Notification Management menu
  • Choose the application producing notifications, (e.g. Whatsapp, Messaging or other) 
  • Change Vibrate menu to ON/OFF


pátek 30. srpna 2013

Configuring IBM Process Designer to connect to a different virtual server

As you all know, the IBM Process Designer needs a Process Center to connect to (the binding is shown on the figure below). Sometimes it might be handy to know how to switch one process center to another (e.g. different virtual images with the IBM software).

This howto supposes you are using IBM Process Designer 8.5. and Windows 7 as you guest OS.


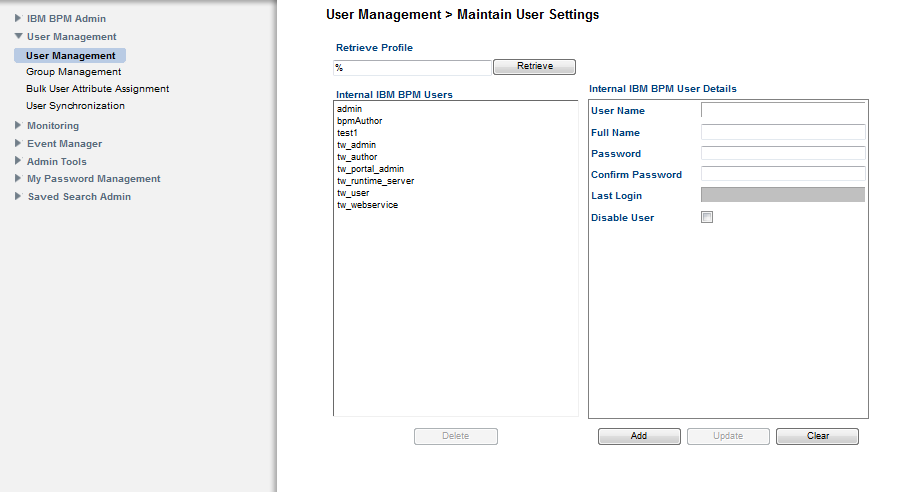
IBM BPM Components structure, resource: www-304.ibm.com


It's pretty simple. IBM Process Designer (former Lombardi) is based on eclipse. That means it has eclipse.ini file for configurations. One of the configuration is also the Process Center URL to connect to. The eclipse.ini file is usually located in the root folder of the BPM software (e.g. c:\IBM\ProcessDesigner\v8.5\eclipse.ini if you are running it on windows).

This is what you need to do to switch for another Process Center:
1] find out the IP of your server machine.
1.1] Login to the server where Process Center Server is running.
1.2] use cmd and ipconfig commands to find out the IP;

2] check your hosts config (on windows: C:\windows\system32\drivers\etc)
2.1] In order the BPD to work correctly you need to have the following line:

  • <the server IP>  ibmbpm
This is how it could look like if you IP would be 192.168.29.131:

  • 192.168.29.131        ibmbpm

This tells your system that when you enter "ibmbpm" into a browser, you want to connect to the specified IP.

3] check your eclipse.ini (rather in WordPad instead of notepad)
It should contain the following line:

  • -Dcom.ibm.bpm.processcenter.url=https://ibmbpm:9443
This tells the BPD to expect the Process Center on ibmbpm, port 9443. Remember that we have set up "ibmbpm" to be interpreted as the IP of our Process Center Server.

Whomp! thats it. You can now run your BPD with the new Process Center attached.

pátek 9. srpna 2013

IBM BPM Adding users

It is always fun when you are getting into a software for the first time ;-). This time it was the IBM Business Process Manager for me.


One of the tasks you'd have on the way is User Management. I was in the middle of my BPD creation willing to test the process via a real user interface. OK, that needs some test user right?

Blind lane

I went to my http://ibmbpm:9443/ProcessCenter -> Admin and saw Manage users window. The feeling was: "yiiippiieee, that was easy!". Not for long :). The thing I did not realize was that you can only add existing users via the ProcessCenter. And so I was digging around in the ProcessCenter for quite a while, trying to find the option for new user adding. Do not do that this way :)


Solution

IBM BPM offers a bunch of portals for various tasks. User management functionality can only be accessed via the ProcessAdmin portal - http://ibmbpm:9443/ProcessAdmin . When you come to this point, it is getting straightforward: User Management -> Add ;-).


Sometimes I'm a newbie! :)

čtvrtek 8. srpna 2013

Deploying Bonita on WebSphere (linux) for newbies

Last few days, I have been trying to setup Bonita Open Solution on WebSphere Application Server version 7 on a Linux machine (CentOS6.3). This article describes specifics that you need to keep in mind when being on this track.


Although Bonita team is trying hard to provide with documentation, docs on linking Bonita with WebSphere are missing. After few hours searching I found this tutorial, which was very helpful since I was pretty new to the world of WebSphere and EE applications in general.

The tutorial, however, needs some more steps to be followed, otherwise you get a non working instance of Bonita.


OK, so what I wanted to achieve was: Having the Bonita execution Engine and Bonita User Experience running on the platform of WebSphere. These are the steps that might help you to accomplish the goal:

  • Follow he steps of the tutorial mentioned up on the page
    • There might be some problems in the course of actions
      1. xcmis.war file application is missing in the bundle.
        • the .war files are the same for all application servers
        • so you can download a different Bonita bundle (like Bonita-Tomcat) and get it from there. You can find it in "BUNDLE_DIR/webapps/xcmis.war". You will use this file to install the xcmis application in WebSphere console.
        • !! xcmis.war is not the only file you need to import from the tomcat/jboss bundle. You also need to copy the xcmis conf directory (to be found in "BUNDLE_DIR/external/xcmis". You need to copy this folder to <Websphere_HOME>/external/xcmis on your server.
  • After starting bonita.war and xcmis.war applications you will try to access your Bonita User Experience (typically somewhere on localhost:9080/bonita/). This might fail with "Error occured while applying the theme". You might skip this this message with clicking on Use default theme.
  • Then, another error appeared. "BonitaInternalException: Bonita Error: bai_APII_2"
    • This may have two reasons:
      1. the WAS_INSTALL_ROOT environment variable is missing
        • to check that go on command line and write 'set | grep WAS_INSTALL_ROOT"
        • if an empty line is returned, the variable is missing
        • to fix this:
          •  make a file in /etc/profile.d/bonita.sh (as root)
          • put these lines into the file: 
            • WAS_INSTALL_ROOT=<path_to_your_install_root>
            • export WAS_INSTALL_ROOT
      2. there is a wrong \ sign in the tutorial
        • You can avoid this error if you got to WebSphere -> Servers -> Enterprise Application Server -> server1 -> Java and processes -> Process definitions -> Java Virtual Machine and  edit the JVM arguments field the following way:
        • change the beginning of the line from "-DBONITA_HOME=${WAS_INSTALL_ROOT}\bonita" to "-DBONITA_HOME=${WAS_INSTALL_ROOT}/bonita" (backslash to slash change)
  • Restart the server
  • Reload Bonita User Experience.
  • You may get "Unable to login. Check your username and password" after entering default (admin/bpm) credentials.
    • When you the check the server log in <WAS_INSTALL_ROOT>/AppServer/profiles/AppServer01/logs/server1/SystemOut.log, you may find "No LoginModules configured for BonitaAuth" error message
      • The  reason is WebSphere cannot load the external/security/jaas-standard.cfg file
      • You need to add this line to WebSphere JVM arguments: "-Djava.security.auth.login.config="<WAS install folder>/external/security/jaas-standard.cfg"
      • restart websphere
    • Note: WebSphere also cannot interpret /* comments in config files. Please check if there are no /* comments in yout jaas-standard.cfg file. If yes, simply remove them. Otherwise you will get another error in the websphere SystemOut.log
  • restart the server.
  • now the bonita user experience should work fine on localhost:9080

středa 22. května 2013

WebSphere UpdateInstaller Install Problem

... and so it was needed to update my Websphere from 7.0.0.0 to 7.0.0.27. It was all running on AIX 5.3, oh well. Some issues on the way that might suprise WebSphere newcomers follow.


Old java
First, you gotta know, you need an IBM or Sun Java 2. I had java 1.4.2 :-) and was getting various errors, none of them stating it was a wrong version of java. The only common message was the command line output: "lease check for log files in the "updilogs" subdirectory of the current user's home directory...."

Resolution:
To run the install on command line and use the bundled Java, do the following:
./install -options responsefile.updiinstaller.txt -silent -is:javahome /install/was_bonita/JDK/jre.pak/repository/package.java.jre/java/jre


License agreement
Next you might get an error on noc accepting the license. The command prompt says: "Please check for log files in the "updilogs" subdirectory of the current user's home directory. If no logs have been produced there, please try running the install command again, with this additional parameter: -is:javaconsole"

In such case you need to see the log. If the license acceptance is the problem, the following will be shown in the /updilogs/log.txt file:
com.ibm.ws.install.ni.ismp.actions.ISMPWarningDialogAction, wrn, INSTCONFFAILED : LICENSE_NOT_ACCEPTED : Accept the license agreement in the response file before installing.

Resolution: add the license accept option to your response file.
-W silentInstallLicenseAcceptance.value="false"

úterý 21. května 2013

Migrating Virtualbox image to VMWare

Well... time from time one gets to a situation when he/she has an image in Oracle VirtualBox and needs to use it in VMWare, or other virtualization tools. So did I, trying to migrate my machine set up on VirtualBox to VMWare.

Sounds easy at the beginning:
1] Go to your VirtualBox and select File -> Export Appliance
2] Export the machine as .OVF (not .ova, explained below)
3] wait few hundreds minutes for the export to finish
4] Go to your VMWare Player click Open Virual Machine and select the OVF you created.
5] It tells you "The import failed because *.ovf did not pass OVF specification conformance or virtual hardware compliance checks". Don't worry and hit retry.


Life would be nice if this worked right? But it quite does not. OVF being Open Virtualization Format is described to be a standard. VirtualBox and VMWare can interpret different formats of the file. So you need to do the following:

  1. Open the <yourfile>.ovf in your favorite XML editor
  2. Find ovf:format parameter in a Disk tag and change it to "http://www.vmware.com/interfaces/specifications/vmdk.html#streamOptimized"
  3. Find any elements describing a SATA disk and change it to SCSI. 
    • remember to have instanceId unique within the document
    • set lsilogic as resourceSubType
  4. make sure all elements called Item under the Section tag have the order of tags:
    • Caption
    • Description
    • InstanceId
    • ResourceType
    • ResourceSubType
    • Address (optional)
    • BusNumber(optional)
    • example:


  5. open command prompt (Start -> cmd.exe) 
    • navigate to your VMWare folder 
      • usually this way: cd "C:\Program Files (x86)\VMware\VMware Player"
    • navigate to OVFTool folder (cd OVFTool)
    • run ovftool to generate a VMX file: ovftool your-ovf-file.ovf  new-appliance-vmx
  6. if you made the order of tags in the OVF file correct, the process starts running (and it takes some time)
    • It might give you some errors... for instance:
      • Unsupported element 'ResourceType'
      • Missing child element 'InstanceId'
      • These errors are caused by a wrong order of tags.
        • in such case go to the line with the error and check the order of tags as described in step #4.
    • You may also get "OVF hardware element ResourceType with instance ID 5: No support for the virtual hardware device type 20"
      • that means you still have a SATA disk specified somehwre in the OVF file
      • go back to the OVF file and find all lines containing SATA, change that as described in step #3.
  7. Now it should generate a VMX file that you can open in VMWare.

Good luck everybody!


úterý 4. prosince 2012

DOT4 in printing explained

OK, now it's time to make a little mention on what the DOT4 thing is, when you talk about printers.

When you take a dive into HP windows drivers, you will most likely get to see the contents of it's .inf file soon. Almost every printer being listed there has a DOT4 text in parentheses somewhere at the end of the line. One could thing it would be a simple wikipedia search, but that gives you back an article about breaking fluid :-), then you search a couple of hours and you get there:

DOT4 port is a virtual port windows uses for communication with printers. In general, there is one port for each feature of the multi functional device. Printers usually need a driver that helps windows to structure the information for the printer in a way the printer understands. The data for the printer then flow through the certain DOT4 port that is responsible for the certain printer feature.

Happy printing!